Thursday, November 18, 2010

Notes 08: Tone Mapping

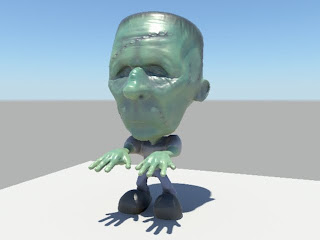
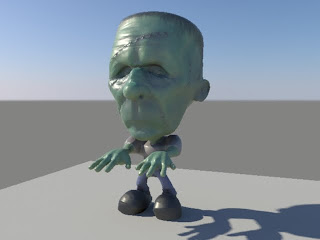
Tone Mapping:
refers to the technique of adjusting the colours of the rendered image in a camera in order to bring them within a value range that looks better on a computer screen

This is usually used when using techniques such as IBL or physical sun. It is also used when using the mia materials. these are physically accurate and menat to simulate the materials in the real world.

1: render


2: go to cam under mental ray, click on the checker box of lens shader and select mia_exposure_simple


3: set pedestel to a negative level. It decreases the level, this adds black
gain increases the over all brightness, so devrease gain. Knee is used for fine tuning.

Notes 07: Physical sky

Physical sky:

1: create physical sky


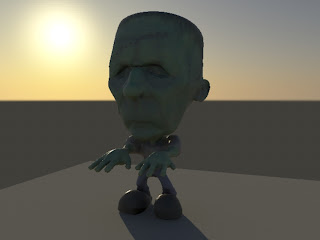
2: rotate the light to make it look like early morning


3 rotate it to make it face the camera, eveningish


down - noon
parallel to the horizon - late evening


the light attributes can not be controlled under the directional light options, to change the colour etc we must go to the mia_physical sky tab
multiplier- increases or decreases the light intensity by the value
haze- adds haze
RGB shift - changes to warmer n cooler colour + wwarmer colour, - cooler colour
to get rid of the horizon decrease the horizon height
sun disc intensity increases the disc intensity
sun disc scale changes the scale of the physical sun
glow intensity changes the intensity of the glow
the background is in the alpha so we can edit it in the compositing softwares

when we create a new camera our render shall appear more different than how it os supposed to look when rendered through that camera
when we add the physical sky to the scene the cameras like the perspective ones shall add a mental ray shaders to it under mental ray tab
environment & lens shader
to fix this waht we will have to do is go under the mia_physicalsky1 attribute editor and then scroll to the very bottom and click on update camera connections

Notes 06: FG 2

1: off default light, render


2 FG increased accuracy, secondary diffuse bump
apply lambert to the objects in the lamp, change colour then a
lighter version of it to the incandescence


3: Create a plane with a lambert shader colour white
a lil bit of incandescence (greyish)
the under render stats unchecked cast shadows, recieve shadows, primary visibility


4 Increase the V value in the Incandescence

No lights used here ^_^ just object shaders :P

Notes 05: GI & FG

1: Lamp light - area light shape sphere


2: Create a spot light to cast the photons
Switch on GI
increase GI photons


3: increase accuracy, decrease scale colour


4: Activate FG then increase the secondary diffuse bounce


Notes 04: Light Shaders

1: Create a Point Light palce it insde the lamp
increase the intensity, set decay to linear
switch on the raytrace shadows


2: under the point light attribute, under mental ray go to custom shaders and then select
the light shader and apply physical light
( now none of the point light attribute changes affect the light, only the physical sky changes it)

The colour attribute here is incharge of the intensity and by default the values of RGB are set to 1000
Threashold of light tightnes the area of light around the light


3: change the spot light to an area light and use the shape of a sphere, scale down to remove the graininess we can change the samples


4: Change the shader of the lamp


Notes 03: Caustics

Caustics:

1 No caustics or anything, just one spot light


2 Aother spot light used only for the caustics


3 Decrease accuracy, change the Radius


4 Change the refractive index of the object


5 Change the Cone angle and the position of the Caustic light to get a more accurate render


6 Changed the material property to blin, tweaked the values to emulate a metallic object


7 changed the colour of the object


Notes 02: Final Gathering

1: Default FG, no extra light here as the camera here adds the light bounces n colour bleeding that is required


2: increase the diffuse bounces


3: increased accuracy


Point density - density of each of the ray of light
Point Interpolation - increasing this can increase the smoothness of the shadow (must be careful with this)
ZPrimary Diffuse Scale - another way to brighter the overall effect (works with colour swatch, better with HSV value)
Secondary Diffuse Scale - has the same value but brightens the secondary bounces


8 changed the V value to 1.1, increased the calue of point density


FG MAP - fg map, rebuild on,
name the primary final gather file
create a test render
wen we go back to our scene we can see a 3d FG reperesntation of the scene which comes out of the camera


to use the map, switch off rebuild
this decreases the render time by a lot :D

USing a FG map in an animated scene

1: create the FG map settings
2: Render
this creates the FG map for that secne (the FG map changes from one frame to another cause since the camera is moving it only stays per frame)
3: Now again go to somewhere later shot and render again ( what this does is add up new maps to the already existing ones like more stuff, so we can use this detail for this and all the other frames in between)
4: Repeat the process. Then when batch rendering this set the Rebuild to Freeze (so then it does not create any more details on the map etc XD )

Notes 01 : Global Illumination


1: with the default, one directional night from above and another point light without any intensity but photons


2: Increase the amount of photons and the GI accuracy


3: Decrease the scale of GI


4: Exponent value decreased in the value of decimels( jus a lil :P)